Adventure mode is a Minecraft game mode where players experience carefully designed worlds created by other players. Unlike regular Minecraft, where players can freely build and destroy, adventure mode restricts what players can do, allowing map creators to design specific challenges, stories, and objectives.
In adventure mode, players cannot break blocks without the proper tools, and some blocks cannot be broken at all. This constraint is what makes adventure mode ideal for building challenges and telling stories because players cannot simply destroy blocks to bypass carefully designed content.
As an adventure map creator, kids and teens can guide players through a world using game mechanics, environmental design, and strategic item placement. The creator will control what players can access, what challenges they face, and how they progress through the adventure.
The goals of this blog post include helping kids and teens:
- Understand the different Minecraft world types and their applications
- Create their own adventure map from scratch
- Implement unique elements including breadcrumbing, pathways, and challenges
- Use commands to test and refine an adventure map
- Balance difficulty and prepare players for success
Preparing the Adventure: Game and World Settings
Before starting to build, the adventure creator needs to configure the world correctly. These settings will determine how the adventure map functions and what tools are available.
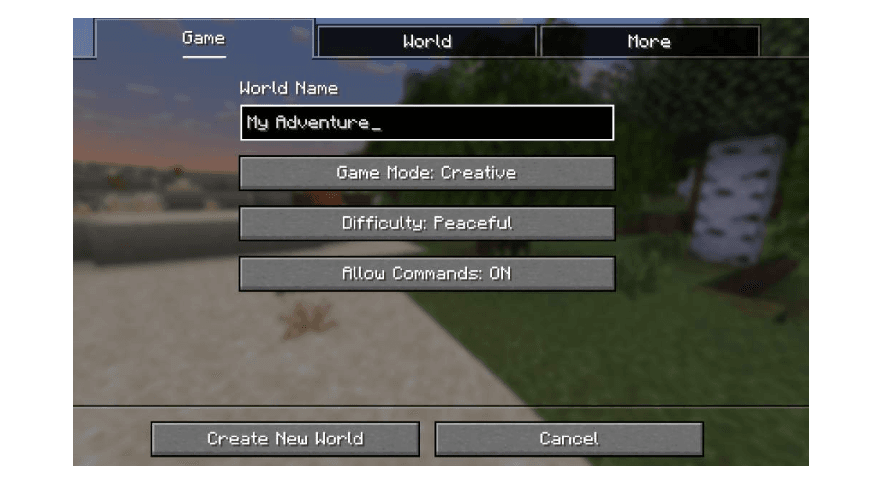
Creating the Adventure
- Create a new world and name it something like "My Adventure," so it's clear what type of world it is.
- Change the mode to Creative Mode (this allows building freely without gathering resources).
- Make sure Allow Commands is ON (this will be needed to test the map later).
Configuring World Options
Next, the creator will use the "World" tab to make final edits before creation:
- Click the World Options tab.
- Set Generate Structures to OFF (this gives a cleaner canvas to work with).
- Set World Type to Large Biomes (this provides spacious areas to build the adventure).
- Click Create New World.
Tip: If the menu Looks different, and certain settings can't be found, try these alternative steps:
- Create a new world and name it "Adventure."
- Change the mode to Creative.
- Click More World Options.
- Set Generate Structures OFF.
- Set World Type to Large Biomes.
- Set Allow Cheats ON.
- Click Create New World.
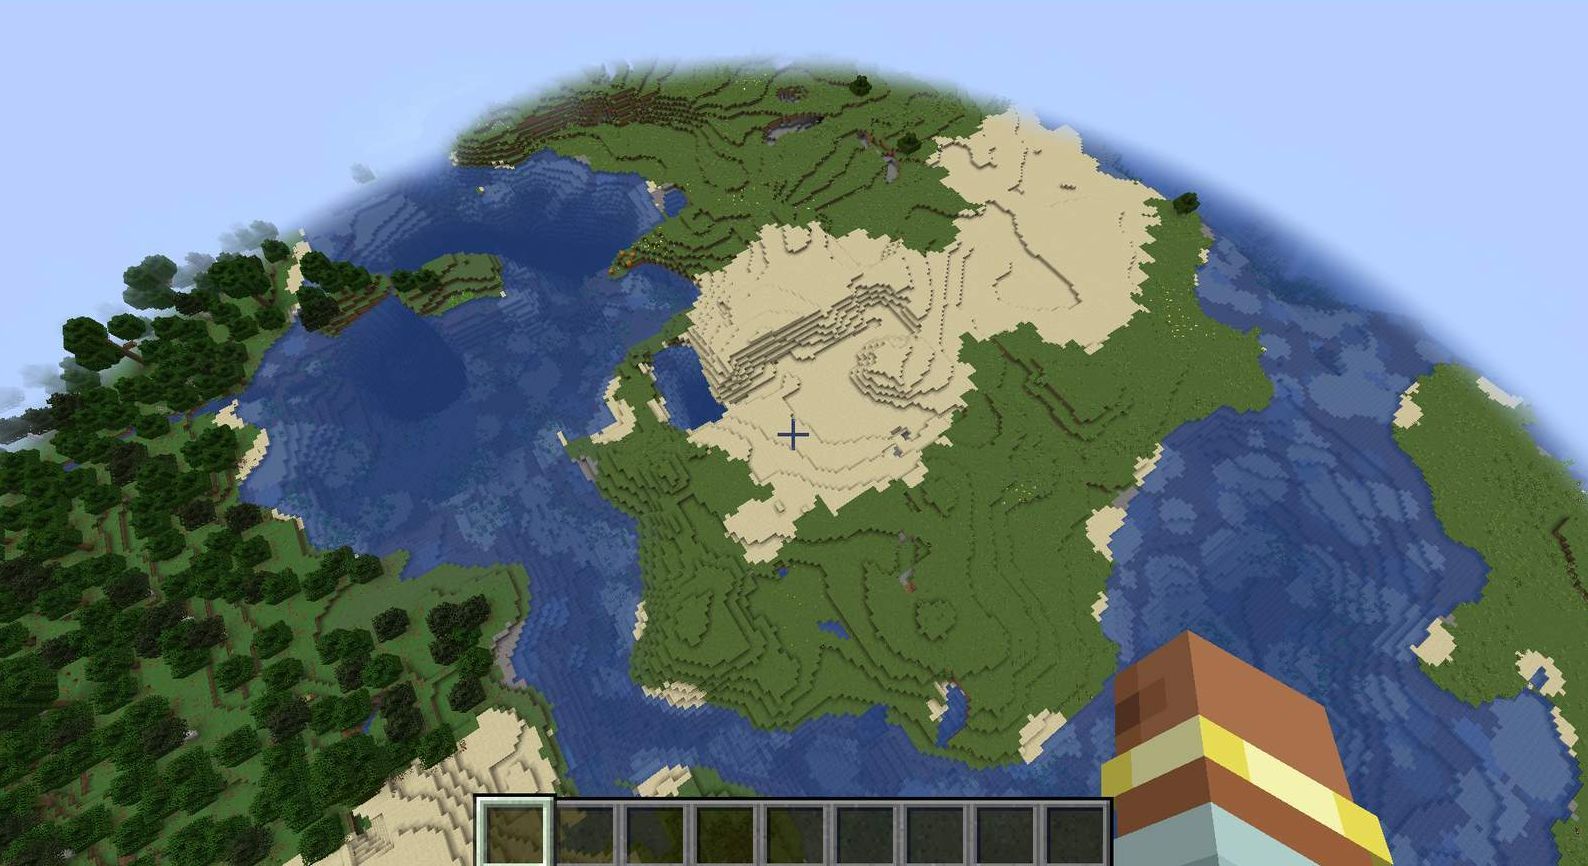
Surveying the World
Now that the world has been created, the builder needs to explore it and find the perfect location for the adventure.
- Press the Space key twice to enter flying mode.
- Look around to get a good view of the world that was created.
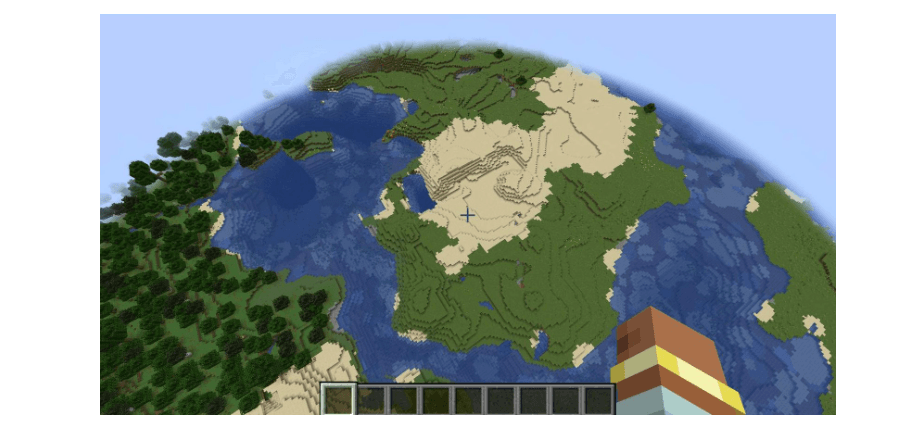
Each generated world is vastly different. The builder will want to fly high in the sky to find a good open area to build in. Look for a nice, open space with plenty of room to construct the starting location, pathways, and challenges.
Tip: If it's difficult to find a good spot, try flying higher. The larger biomes setting provides plenty of space once above the terrain.
Planning the Adventure Map
Before starting to build, the creator should write out the adventure's concept.
- What are the trials?
- What will the player experience?
It's best to start small—the first adventure doesn't need to be huge!
The adventure map must include the following elements:
Starting Point: Where does the adventure begin? This could be a home, castle, village, or any location that makes sense for the story.
Ending Point: What is the goal? Perhaps lighting a torch, finding special treasure, defeating a boss, or escaping a dungeon.
A Path to Follow: How will players get from start to finish? This could be a road through a forest, a tunnel through caves, a bridge across water, or any route that guides them through the world.
Challenges and Obstacles: What will make this adventure interesting? Include zombies, lava pits, mazes, locked doors, or other obstacles that require the player to think and act strategically.
Write and draw the ideas on a piece of paper! Sketch out the map layout, mark where challenges will go, and plan the starting location. This planning phase will save time when building.
Learn more about how to build a Minecraft obstacle course
Building the Starting Location
Now it's time to start building. Again, the starting location doesn't need to be complex. It just needs to be clear that this is where the adventure begins.
Construction Steps
- Build a starting location such as a small house, castle, hut, or any structure that fits the adventure's theme.
- Add details to make it visually interesting: flowers around the house, lanterns at the entranceway, or other decorative elements.
- Furnish the interior with a bed and other items that make the space feel lived-in: bookcases, chests, tables, chairs, and other furniture.
- Add personal touches by including items that reflect who the character is. Look around the building and add at least one unique item that tells players something about the person who lives there.
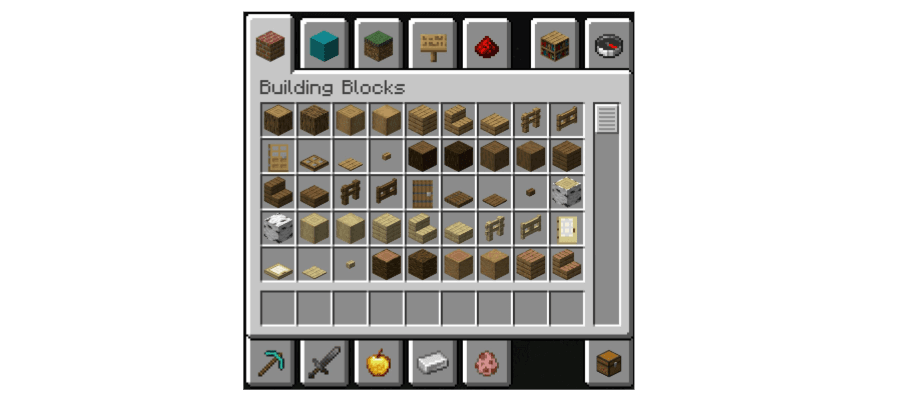
Accessing the Inventory
Press the E key to open Creative Mode inventory and access all available blocks and items for building. The builder will have unlimited resources, so there's no need to worry about running out of materials!
Adding Character to the Starting Location
Before moving on, the creator should add finishing touches that reflect who the character is. This helps players understand the story and feel immersed in the world.
Consider: Who is the hero?
- A firefighter
- An adventurer
- A peasant
- A farmer
- A member of royalty
- Someone else entirely
Then ask: Where would they live?
- A firehouse
- A hut
- A farmhouse
- A castle or tower
- A location that matches their profession or status
Make sure the starting location's design, decorations, and furnishings match the character that's been created. This attention to detail makes the adventure map feel more complete and helps players understand the story from the moment they spawn.
Preparing Items for Players
Since players can't break blocks in adventure mode, they can't craft tools or gather resources. The map creator needs to provide them with the items they'll need to complete the adventure.
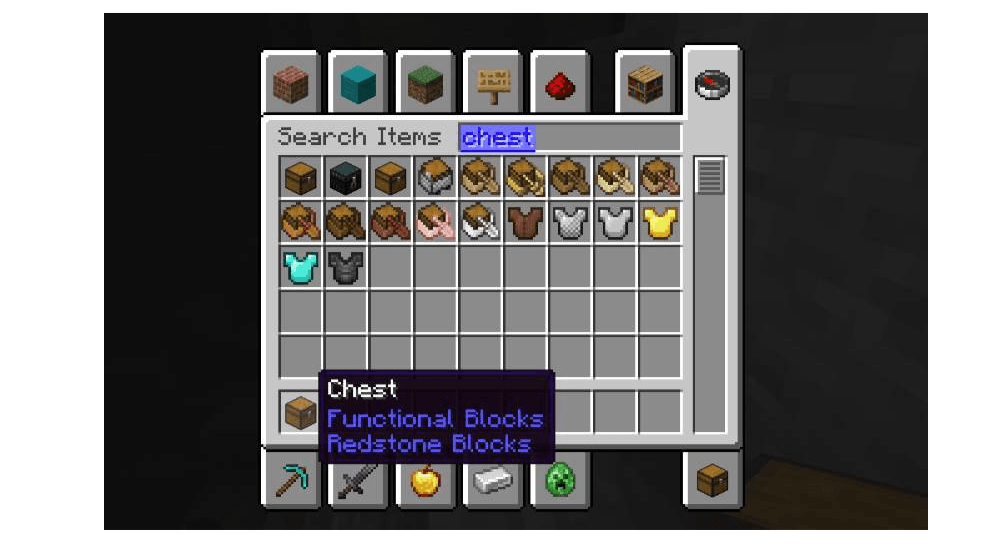
Creating a Treasure Chest
- Open the Inventory (press E).
- Find and add a Chest to the inventory.
- Place the chest in the starting location.
Stocking the Chest
Think carefully about what items will help players succeed. Consider including:
- Weapons (swords, bows, axes)
- Armor (helmets, chestplates, leggings, boots)
- Tools (pickaxes, shovels, axes)
- Food (bread, apples, cooked meat for health recovery)
- Ammunition (arrows if providing a bow)
Now fill the chest:
- Open the Inventory again.
- Decide which items players will need and add them to the inventory.
- Right-click the chest to open it.
- Place the selected items inside.
Tip: As more challenges are added to the adventure map later, the creator may need to add more items to this chest or create additional chests with specific items. Don't forget to update the supplies!
Creating the Adventure Path: Breadcrumbing
Now the builder will design the route players will follow through the adventure. Visual guides and signs will be used to lead them from start to finish without getting lost.
Understanding Breadcrumbing
Breadcrumbing is a game design technique where a trail is created for players to follow. The term comes from the classic story of Hansel and Gretel, where the characters left breadcrumbs in the woods to find their way home. In an adventure map, signs, pathways, and visual markers will guide players through the experience.
Planning the Path
- Double-click the spacebar to fly up above the starting location.
- Look down at the world and mentally draw a path from the starting point to the ending point. Visualize where players will go and what they'll encounter.
- Consider the journey: Should players go through a forest, down into caves, across water, or through a village? Make the path interesting but clear.
Using Signs to Guide Players
Signs are essential breadcrumbing tools. They tell players exactly where to go and what to do, preventing confusion and keeping them on the intended path.
Adding Signs to the Inventory
- Open the Inventory (press E).
- Click on the Functional Blocks tab.
- Scroll down until the sign section is visible.
- Select a sign type and add it to the inventory.
Placing and Editing Signs
- Select the sign by pressing the corresponding keyboard number shown in the inventory.
- Place the sign by clicking and holding where it should go.
- Edit the sign by typing the message in the popup window. Be clear and concise: "Go North," "Enter the Cave," "Defeat the Boss," etc.
- Click Done to finalize the sign.
Tip: Place signs at decision points where players might be unsure which way to go, and before major challenges to give them warnings or instructions.
Strategic Sign Placement for Challenges
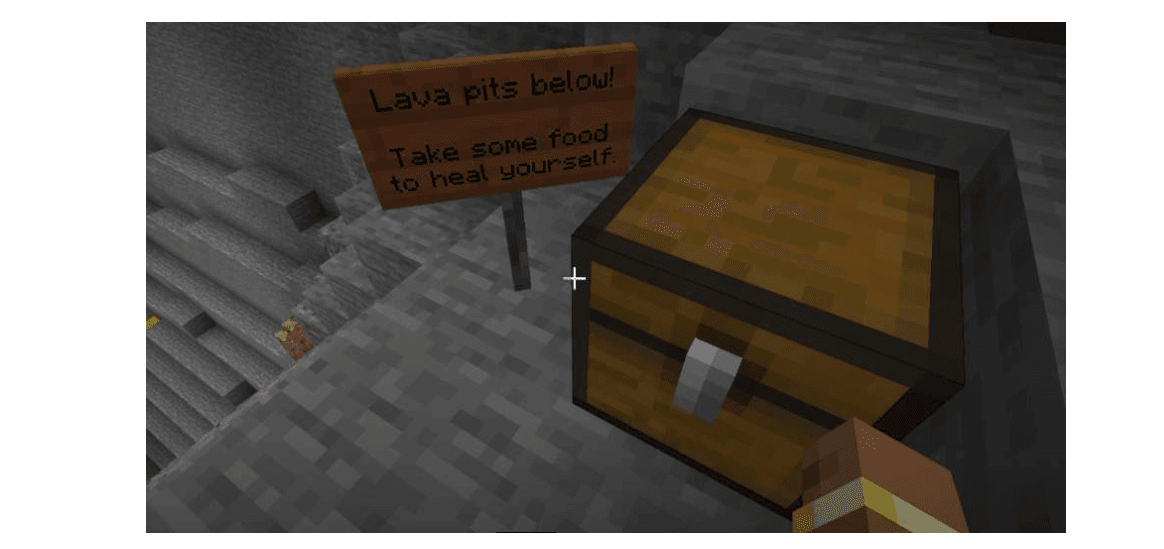
Beyond directional signs, the creator needs to prepare players for what's coming. Signs should be used to warn them about obstacles and give them time to prepare.
- Place a sign at major waypoints along the path to confirm players are going the right direction.
- Add warning signs before challenges: Place signs before lava pits, boss fights, or dangerous areas. Examples: "Lava Pit Ahead!" or "Boss Fight - Prepare Yourself!"
- Provide necessary items in chests: If players need specific items to face a challenge (such as a bow and arrows, or armor), place a chest with those items before they encounter the challenge. Add a sign above or near the chest explaining what's inside and why it's needed.
Tip: Never surprise players with a challenge they're unprepared for. Always give them warning and access to the tools they'll need to succeed.
Creating Visual Pathways
Beyond signs, physical pathways should be created that guide players visually. These can be:
- A path of colored stones (like a yellow brick road)
- A line of flowers or plants
- A cleared trail through grass
- A rope or fence line
- Any distinctive visual marker that stands out from the surrounding terrain
Why this matters: Visual pathways reinforce the breadcrumbing strategy. Even if a player misses a sign, the pathway itself guides them in the right direction. Players won't get lost trying to find the next sign because the path is always visible beneath their feet.
Adding Enemies and Obstacles
Now the builder can add challenges to the adventure. Start with enemies, but remember, balance is key. Too many enemies will frustrate players; too few won't provide challenge.
Adding Enemies with Spawn Eggs
- Open the Inventory (press E).
- Click on the Spawn Eggs tab.
- Scroll through the list and select a spawn egg for the desired enemy type:
- Zombie - Classic melee enemy
- Creeper - Explosive threat
- Skeleton - Ranged attacker
- Spider - Fast-moving threat
- Or choose another enemy type
Learn more: Minecraft Words & Terms
Preparing Players for Combat
Before players encounter enemies, make sure they have the tools to fight back:
- Provide weapons in a chest before the combat area (swords, bows, axes)
- Include healing items (health potions, food) so players can recover from damage
- Add armor if the creator wants to make the challenge easier
- Use signs to warn players: "Enemies Ahead - Arm Yourself!"
Tip: The first adventure should include just a few enemies in each area. As the creator gets more experienced at map design, more complex combat scenarios can be created.
Playtesting the Adventure Map
Once the adventure has been built, it's time to test it from a player's perspective. Playtesting helps identify problems, balance difficulty, and catch anything that was forgotten.
Entering Adventure Mode
- Go back to the beginning of the adventure (the starting location).
- Press the / key to open the command console.
- Type /gamemode adventure to switch to adventure mode.
- Press Enter.
What to Look For While Playtesting
As the creator plays through the adventure, they should ask themselves:
- Can the path be clearly seen?
- Are the signs helpful and easy to read?
- Are there the items needed to complete each challenge?
- Is the difficulty balanced? (Not too easy, not too frustrating)
- Were any important areas missed or items forgotten?
- Do the challenges feel rewarding when completed?
Iterating the Design
If problems are found during playtesting:
- Press the / key.
- Type /gamemode creative to return to creative mode.
- Press Enter.
- Make the necessary changes to the map.
The creator can swap between adventure and creative modes as many times as needed:
- Adventure Mode (/gamemode adventure) - Test the player experience
- Creative Mode (/gamemode creative) - Make improvements
Repeat this process until the adventure feels polished and plays smoothly from start to finish.
Troubleshooting Tip: If stuck during playtesting, remember that the creator can always switch back to creative mode to fix the problem. There's no penalty for testing multiple times!
Next Steps
Congratulations! The first adventure map has been created. Now that the fundamentals are understood, here are ways to expand the skills:
Enhance the Map:
- Add more complex puzzles and challenges
- Create multiple paths through the adventure
- Design boss fights with specific mechanics
- Add story elements through signs and environmental details
Learn More:
- Experiment with command blocks for advanced mechanics
- Explore Minecraft mods to add new features
- Study other adventure maps to see how experienced creators design challenges
- Share the map with friends and gather feedback
Remember: Every expert map creator started exactly where the builder is now. Keep building, keep testing, and keep improving. The next adventure map will be even better than this one!
For builders who want to deepen their skills, Minecraft camps offer immersive, hands-on experiences where creators can learn from experts and collaborate with other young builders. These educational opportunities provide structured learning paths for creators ready to take their skills to the next level.